
This guide explains how to install Metamod on a GoldSrc Half-Life Dedicated Server. Metamod sits between the Half-Life engine and the game DLL, allowing the server to load additional server plugins such as AMX Mod X and other native Metamod plugins.
It can be used with Half-Life and many other GoldSrc games and mods, including Counter-Strike, Team Fortress Classic, Day of Defeat and Natural Selection.
Choosing a Version of Metamod
There are a few different versions of Metamod available. Which one you use will depend largely on the type of server you are running.
- Metamod 1.20 is the original version of Metamod.
- Metamod-P is an updated version with additional fixes, improved performance and automatic plugin detection.
- Metamod R is intended primarily for servers running ReHLDS.
For a normal Half-Life Dedicated Server, Metamod-P is generally the version I would use.
Step 1: Create the Metamod Folders
Open the folder for the game or mod you are running. For standard Half-Life this will normally be the valve folder. Other examples include cstrike for Counter-Strike and tfc for Team Fortress Classic.
Inside the game folder, create the following directory structure:
addons/metamod/dllsPlace the Metamod library inside the dlls folder.
On Windows this will normally be:
valve/addons/metamod/dlls/metamod.dllOn Linux the library will be a .so file, for example:
valve/addons/metamod/dlls/metamod.soIf you are installing Metamod for another game, simply replace valve with the appropriate game folder.
Step 2: Edit liblist.gam
Metamod needs to be loaded instead of the normal game DLL. This is configured through the liblist.gam file inside your game folder.
Open liblist.gam in a text editor and look for the normal game DLL entries.
On Windows you should see something similar to:
gamedll "dlls\hl.dll"On Linux:
gamedll_linux "dlls/hl.so"You can comment out the original entries by placing // at the beginning of the line:
//gamedll "dlls\hl.dll"
//gamedll_linux "dlls/hl.so"
Then add the appropriate Metamod entry.
Windows:
gamedll "addons\metamod\dlls\metamod.dll"Linux:
gamedll_linux "addons/metamod/dlls/metamod.so"Save the file once the changes have been made.
Step 3: Start the Server
Start HLDS as normal. If everything has been installed correctly, the server should start without any Metamod related errors.
Once the server is running, open the server console and enter:
meta versionIf Metamod is working, it will display information about the version currently loaded.
You can also use:
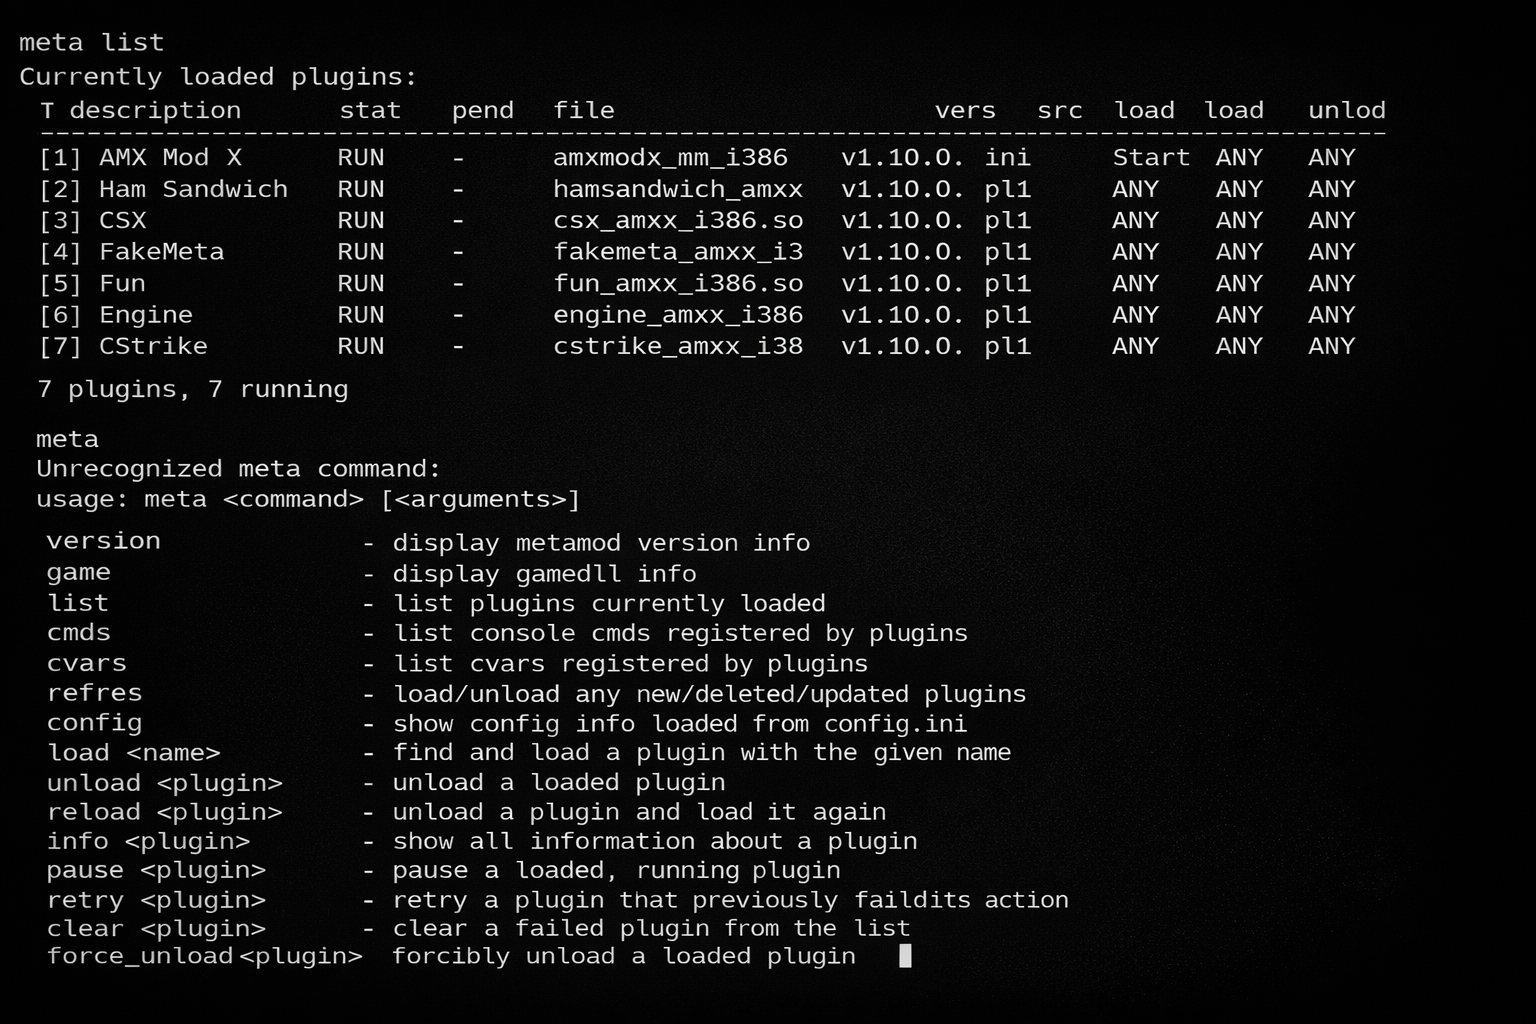
meta listThis displays any Metamod plugins currently loaded by the server. If you have only just installed Metamod, there may not be any additional plugins listed yet.
Installing a Metamod Plugin
Metamod can load plugins directly without AMX Mod X. These are normally compiled libraries using a .dll file on Windows or a .so file on Linux.
This is useful for plugins which work directly through Metamod, such as movement plugins, server utilities or older gameplay additions. A bunny hop plugin is a good example.
The exact filenames and folder structure can vary depending on the plugin, so always check any instructions supplied with it. A common approach is to give each plugin its own folder inside addons.
For example, a bunny hop plugin might be placed inside:
addons/bunnyhop/dllsOn Windows the plugin might then look something like:
addons/bunnyhop/dlls/bunnyhop.dllOn Linux:
addons/bunnyhop/dlls/bunnyhop.soThe actual filename may be different, so use the filename supplied with the plugin rather than assuming it will always be called bunnyhop.dll or bunnyhop.so.
Adding Plugins to plugins.ini
Metamod uses a file called plugins.ini to determine which additional plugins should be loaded.
This file is normally located at:
addons/metamod/plugins.iniIf the file does not already exist, you can create it using a normal text editor.
Each Metamod plugin is added on its own line.
For example, on Windows:
win32 addons/bunnyhop/dlls/bunnyhop.dllOn Linux:
linux addons/bunnyhop/dlls/bunnyhop.soYou can add more than one plugin to the same file. For example:
linux addons/bunnyhop/dlls/bunnyhop.so
linux addons/amxmodx/dlls/amxmodx_mm_i386.so
In this example Metamod would load both the bunny hop plugin and AMX Mod X.
You only need to configure liblist.gam once. Additional Metamod plugins are added through plugins.ini, not by changing liblist.gam again.
Checking That a Plugin Has Loaded
After adding a plugin, restart the server and run:
meta listThis will display the Metamod plugins currently known to the server and their status.
You should see your new plugin listed alongside anything else Metamod is loading, such as AMX Mod X.
If you want more information about a particular plugin, you can use its number from the meta list output with:
meta info 1Replace 1 with the number shown beside the plugin you want to inspect.
Disabling a Metamod Plugin
If you want to stop a plugin from loading, the simplest method is to remove its line from plugins.ini or comment it out.
For example:
;linux addons/bunnyhop/dlls/bunnyhop.soThis is useful when testing plugins because you can disable one without deleting its files.
After changing plugins.ini, restart the server to make sure the new plugin list is loaded cleanly.
Metamod Plugins and AMX Mod X Plugins
It is worth understanding the difference between a Metamod plugin and an AMX Mod X plugin, as they are installed in different ways.
A native Metamod plugin is normally a compiled .dll or .so library. It is loaded directly by Metamod through addons/metamod/plugins.ini.
AMX Mod X itself is one of these Metamod plugins.
An AMX Mod X plugin normally uses the .amxx file extension and is loaded by AMX Mod X rather than directly by Metamod. Those plugins are configured separately through addons/amxmodx/configs/plugins.ini.
If you are unsure which type of plugin you have downloaded, check the file extension and the instructions supplied by the plugin author.
Troubleshooting
If the server reports that the Metamod library cannot be found, double check the folder structure and the path entered in liblist.gam. Linux file and folder names are case sensitive, so the capitalisation must also be correct.
If the server will not start after editing liblist.gam, temporarily restore the original game DLL entry and make sure the server starts normally. You can then check the Metamod path again.
If Metamod is running but an individual plugin does not appear in meta list, check the path entered in addons/metamod/plugins.ini and make sure the plugin file exists in that location.
If the plugin appears in the list but fails to load, check that you are using the correct Windows or Linux version of the plugin and that it was built for the version of Half-Life or GoldSrc server you are running.
Linux plugins also need to be compiled for Linux. Renaming a Windows .dll file to .so will not convert it into a Linux plugin.
If you are using an older or less common GoldSrc mod and Metamod does not recognise it correctly, Metamod-P may provide better automatic detection.
Where To Go Next
Once Metamod is running, you can either install native Metamod plugins directly or use it as the foundation for AMX Mod X.
If you only need a simple native plugin, such as a movement or bunny hop plugin, there is no requirement to install AMX Mod X unless that particular plugin depends on it.
If you want access to the much larger collection of AMX Mod X plugins and administration tools, the next step is to install AMX Mod X and configure it through Metamod.
If you run into any problems, you are also welcome to join the MightyXen Discord community.
Summary
- Metamod allows HLDS to load additional native server plugins
- Metamod-P is a commonly used version for standard GoldSrc servers
- Metamod plugins normally use
.dllfiles on Windows and.sofiles on Linux - Additional plugins are configured through
addons/metamod/plugins.ini - You only need to edit
liblist.gamwhen configuring Metamod itself - AMX Mod X is itself loaded as a Metamod plugin
- Use
meta versionto check that Metamod is running - Use
meta listto check which Metamod plugins are loaded